环境说明:
1、系统:CentOS最小化安装;升级软件补丁,内核和系统版本不升级;关闭SELinux和防火墙。系统安装可参考
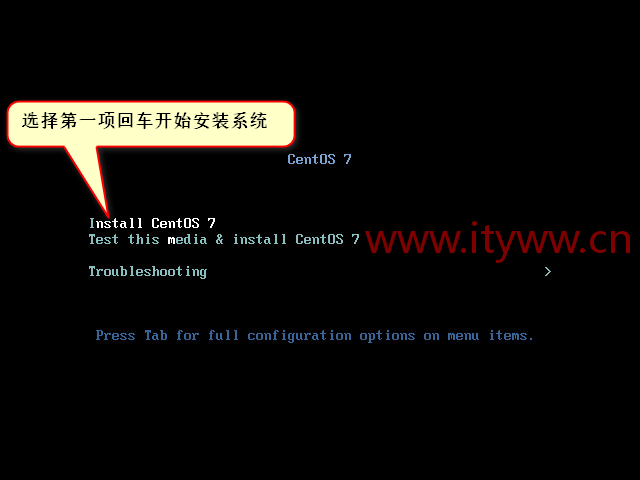
CentOS 7系统部署
IT运维网 版权所有丨如未注明 , 均为原创丨本网站采用BY-NC-SA协议进行授权 , 转载请注明CentO […]
开始安装:
1、CentOS7默认安装了MariaDB数据库,首先将卸载掉。
[root@localhost ~]# rpm -qa | grep mariadb
mariadb-libs-5.5.52-1.el7.x86_64
[root@localhost ~]# rpm -e --nodeps mariadb-libs-5.5.52-1.el7.x86_64
[root@localhost ~]# rpm -qa | grep mariadb
[root@localhost ~]#
2、YUM安装依赖包;不管有没有装过统一都安装下,避免有问题。
[root@localhost ~]# yum -y install autoconf libaio-devel
Loaded plugins: fastestmirror
base                                                                                                                          | 3.6 kB  00:00:00
epel                                                                                                                          | 4.7 kB  00:00:00
extras                                                                                                                        | 3.4 kB  00:00:00
updates                                                                                                                       | 3.4 kB  00:00:00
Loading mirror speeds from cached hostfile
Resolving Dependencies
--> Running transaction check
---> Package autoconf.noarch 0:2.69-11.el7 will be installed
--> Processing Dependency: perl(Data::Dumper) for package: autoconf-2.69-11.el7.noarch
---> Package libaio-devel.x86_64 0:0.3.109-13.el7 will be installed
--> Processing Dependency: libaio(x86-64) = 0.3.109-13.el7 for package: libaio-devel-0.3.109-13.el7.x86_64
--> Running transaction check
---> Package libaio.x86_64 0:0.3.109-13.el7 will be installed
---> Package perl-Data-Dumper.x86_64 0:2.145-3.el7 will be installed
--> Finished Dependency Resolution

Dependencies Resolved

=====================================================================================================================================================
 Package                                  Arch                           Version                                  Repository                    Size
=====================================================================================================================================================
Installing:
 autoconf                                 noarch                         2.69-11.el7                              base                         701 k
 libaio-devel                             x86_64                         0.3.109-13.el7                           base                          13 k
Installing for dependencies:
 libaio                                   x86_64                         0.3.109-13.el7                           base                          24 k
 perl-Data-Dumper                         x86_64                         2.145-3.el7                              base                          47 k

Transaction Summary
=====================================================================================================================================================
Install  2 Packages (+2 Dependent packages)

Total download size: 785 k
Installed size: 2.4 M
Downloading packages:
(1/4): libaio-0.3.109-13.el7.x86_64.rpm                                                                                       |  24 kB  00:00:00
(2/4): libaio-devel-0.3.109-13.el7.x86_64.rpm                                                                                 |  13 kB  00:00:00
(3/4): perl-Data-Dumper-2.145-3.el7.x86_64.rpm                                                                                |  47 kB  00:00:00
(4/4): autoconf-2.69-11.el7.noarch.rpm                                                                                        | 701 kB  00:00:00
-----------------------------------------------------------------------------------------------------------------------------------------------------
Total                                                                                                                5.1 MB/s | 785 kB  00:00:00
Running transaction check
Running transaction test
Transaction test succeeded
Running transaction
Warning: RPMDB altered outside of yum.
** Found 2 pre-existing rpmdb problem(s), 'yum check' output follows:
2:postfix-2.10.1-6.el7.x86_64 has missing requires of libmysqlclient.so.18()(64bit)
2:postfix-2.10.1-6.el7.x86_64 has missing requires of libmysqlclient.so.18(libmysqlclient_18)(64bit)
  Installing : libaio-0.3.109-13.el7.x86_64                                                                                                      1/4
  Installing : perl-Data-Dumper-2.145-3.el7.x86_64                                                                                               2/4
  Installing : autoconf-2.69-11.el7.noarch                                                                                                       3/4
  Installing : libaio-devel-0.3.109-13.el7.x86_64                                                                                                4/4
  Verifying  : perl-Data-Dumper-2.145-3.el7.x86_64                                                                                               1/4
  Verifying  : libaio-0.3.109-13.el7.x86_64                                                                                                      2/4
  Verifying  : libaio-devel-0.3.109-13.el7.x86_64                                                                                                3/4
  Verifying  : autoconf-2.69-11.el7.noarch                                                                                                       4/4

Installed:
  autoconf.noarch 0:2.69-11.el7                                         libaio-devel.x86_64 0:0.3.109-13.el7

Dependency Installed:
  libaio.x86_64 0:0.3.109-13.el7                                        perl-Data-Dumper.x86_64 0:2.145-3.el7

Complete!
3、进入软件包存放目录并解压MySQL二进制安装包至指定安装目录下
[root@localhost ~]# cd /usr/src/
[root@localhost src]# ll
total 308908
drwxr-xr-x. 2 root root         6 Nov  5  2016 debug
drwxr-xr-x. 3 root root        34 Nov  5  2016 kernels
-rw-r--r--  1 root root 316320366 Jan 30 20:41 mysql-5.6.36-linux-glibc2.5-x86_64.tar.gz
[root@localhost src]# tar -zxf mysql-5.6.36-linux-glibc2.5-x86_64.tar.gz -C /usr/local/
[root@localhost src]# ll /usr/local/
total 4
drwxr-xr-x.  2 root root    6 Nov  5  2016 bin
drwxr-xr-x.  2 root root    6 Nov  5  2016 etc
drwxr-xr-x.  2 root root    6 Nov  5  2016 games
drwxr-xr-x.  2 root root    6 Nov  5  2016 include
drwxr-xr-x.  2 root root    6 Nov  5  2016 lib
drwxr-xr-x.  2 root root    6 Nov  5  2016 lib64
drwxr-xr-x.  2 root root    6 Nov  5  2016 libexec
drwxr-xr-x  13 root root 4096 Jan 30 20:44 mysql-5.6.36-linux-glibc2.5-x86_64
drwxr-xr-x.  2 root root    6 Nov  5  2016 sbin
drwxr-xr-x.  5 root root   46 Nov  5  2016 share
drwxr-xr-x.  2 root root    6 Nov  5  2016 src
4、创建软链接
[root@localhost src]# ln -s /usr/local/mysql-5.6.36-linux-glibc2.5-x86_64/ /usr/local/mysql
[root@localhost src]# ll /usr/local/
total 4
drwxr-xr-x.  2 root root    6 Nov  5  2016 bin
drwxr-xr-x.  2 root root    6 Nov  5  2016 etc
drwxr-xr-x.  2 root root    6 Nov  5  2016 games
drwxr-xr-x.  2 root root    6 Nov  5  2016 include
drwxr-xr-x.  2 root root    6 Nov  5  2016 lib
drwxr-xr-x.  2 root root    6 Nov  5  2016 lib64
drwxr-xr-x.  2 root root    6 Nov  5  2016 libexec
lrwxrwxrwx   1 root root   46 Jan 30 20:46 mysql -> /usr/local/mysql-5.6.36-linux-glibc2.5-x86_64/
drwxr-xr-x  13 root root 4096 Jan 30 20:44 mysql-5.6.36-linux-glibc2.5-x86_64
drwxr-xr-x.  2 root root    6 Nov  5  2016 sbin
drwxr-xr-x.  5 root root   46 Nov  5  2016 share
drwxr-xr-x.  2 root root    6 Nov  5  2016 src
5、创建MySQL用户和组(用户属性为禁止登录及不创建家目录)
[root@localhost src]# useradd -s /sbin/nologin -M mysql
6、设置MySQL目录属主和属组
[root@localhost src]# chown -R mysql.mysql /usr/local/mysql/
7、初始化MySQL软件,指明安装目录、数据库存放位置及授权给mysql用户。看到两个OK就代表没问题。
[root@localhost src]# /usr/local/mysql/scripts/mysql_install_db --basedir=/usr/local/mysql/ --datadir=/usr/local/mysql/data/ --user=mysql
Installing MySQL system tables...2018-01-30 20:56:14 0 [Warning] TIMESTAMP with implicit DEFAULT value is deprecated. Please use --explicit_defaults_for_timestamp server option (see documentation for more details).
2018-01-30 20:56:14 0 [Note] Ignoring --secure-file-priv value as server is running with --bootstrap.
2018-01-30 20:56:14 0 [Note] /usr/local/mysql//bin/mysqld (mysqld 5.6.36) starting as process 2509 ...
2018-01-30 20:56:14 2509 [Note] InnoDB: Using atomics to ref count buffer pool pages
2018-01-30 20:56:14 2509 [Note] InnoDB: The InnoDB memory heap is disabled
......此处省略部分信息......
2018-01-30 20:56:17 2509 [Note] InnoDB: Starting shutdown...
2018-01-30 20:56:19 2509 [Note] InnoDB: Shutdown completed; log sequence number 1625977
OK

Filling help tables...2018-01-30 20:56:19 0 [Warning] TIMESTAMP with implicit DEFAULT value is deprecated. Please use --explicit_defaults_for_timestamp server option (see documentation for more details).
2018-01-30 20:56:19 0 [Note] Ignoring --secure-file-priv value as server is running with --bootstrap.
2018-01-30 20:56:19 0 [Note] /usr/local/mysql//bin/mysqld (mysqld 5.6.36) starting as process 2531 ...
2018-01-30 20:56:19 2531 [Note] InnoDB: Using atomics to ref count buffer pool pages
2018-01-30 20:56:19 2531 [Note] InnoDB: The InnoDB memory heap is disabled
......此处省略部分信息......
2018-01-30 20:56:20 2531 [Note] InnoDB: Starting shutdown...
2018-01-30 20:56:21 2531 [Note] InnoDB: Shutdown completed; log sequence number 1625987
OK

To start mysqld at boot time you have to copy
support-files/mysql.server to the right place for your system

PLEASE REMEMBER TO SET A PASSWORD FOR THE MySQL root USER !
To do so, start the server, then issue the following commands:

  /usr/local/mysql//bin/mysqladmin -u root password 'new-password'
  /usr/local/mysql//bin/mysqladmin -u root -h localhost.localdomain password 'new-password'

Alternatively you can run:

  /usr/local/mysql//bin/mysql_secure_installation

which will also give you the option of removing the test
databases and anonymous user created by default.  This is
strongly recommended for production servers.

See the manual for more instructions.

You can start the MySQL daemon with:

  cd . ; /usr/local/mysql//bin/mysqld_safe &

You can test the MySQL daemon with mysql-test-run.pl

  cd mysql-test ; perl mysql-test-run.pl

Please report any problems at http://bugs.mysql.com/

The latest information about MySQL is available on the web at

  http://www.mysql.com

Support MySQL by buying support/licenses at http://shop.mysql.com

WARNING: Found existing config file /usr/local/mysql//my.cnf on the system.
Because this file might be in use, it was not replaced,
but was used in bootstrap (unless you used --defaults-file)
and when you later start the server.
The new default config file was created as /usr/local/mysql//my-new.cnf,
please compare it with your file and take the changes you need.
8、拷贝MySQL配置文件;如果有提示(cp: overwrite `/etc/my.cnf’?)按“y”确认。
[root@localhost src]# cp /usr/local/mysql/support-files/my-default.cnf /etc/my.cnf
9、拷贝MySQL服务脚本并赋予执行权限
[root@localhost src]# cp /usr/local/mysql/support-files/mysql.server /etc/init.d/mysqld && chmod +x /etc/init.d/mysqld
10、配置MySQL环境变量并重载环境变量
[root@localhost src]# echo 'export PATH=/usr/local/mysql/bin:$PATH' >>/etc/profile && source /etc/profile
11、将MySQL启动服务加入到系统服务并检查
[root@localhost ~]# chkconfig --add mysqld
[root@localhost ~]# chkconfig --list mysqld

Note: This output shows SysV services only and does not include native
      systemd services. SysV configuration data might be overridden by native
      systemd configuration.

      If you want to list systemd services use 'systemctl list-unit-files'.
      To see services enabled on particular target use
      'systemctl list-dependencies [target]'.

mysqld          0:off   1:off   2:on    3:on    4:on    5:on    6:off
12、启动MySQL软件
[root@localhost ~]# systemctl start mysqld
Starting MySQL.. SUCCESS!
13、登录MySQL,此时登录密码为空,直接就可以登录进去。
[root@localhost ~]# mysql
Welcome to the MySQL monitor.  Commands end with ; or \g.
Your MySQL connection id is 1
Server version: 5.6.36 MySQL Community Server (GPL)

Copyright (c) 2000, 2017, Oracle and/or its affiliates. All rights reserved.

Oracle is a registered trademark of Oracle Corporation and/or its
affiliates. Other names may be trademarks of their respective
owners.

Type 'help;' or '\h' for help. Type '\c' to clear the current input statement.

mysql>
初始化:
默认安装后的MySQL用户root为空密码状态,存在匿名用户,存在测试数据库;利用/usr/local/mysql/bin目录下的mysql_secure_installation安全配置向导文件来初始化数据库
[root@localhost bin]# mysql_secure_installation


NOTE: RUNNING ALL PARTS OF THIS SCRIPT IS RECOMMENDED FOR ALL MySQL
      SERVERS IN PRODUCTION USE!  PLEASE READ EACH STEP CAREFULLY!

In order to log into MySQL to secure it, we'll need the current
password for the root user.  If you've just installed MySQL, and
you haven't set the root password yet, the password will be blank,
so you should just press enter here.

Enter current password for root (enter for none): <–第一次运行因为用户root为空密码状态所以直接回车即可
OK, successfully used password, moving on...

Setting the root password ensures that nobody can log into the MySQL
root user without the proper authorisation.

Set root password? [Y/n] <– 是否设置root用户密码,默认为“y”直接回车即可。
New password: <– 设置root用户的密码,密码不显示直接输入后回车即可。
Re-enter new password: <– 再输入一次你设置的密码回车即可
Password updated successfully!
Reloading privilege tables..
 ... Success!


By default, a MySQL installation has an anonymous user, allowing anyone
to log into MySQL without having to have a user account created for
them.  This is intended only for testing, and to make the installation
go a bit smoother.  You should remove them before moving into a
production environment.

Remove anonymous users? [Y/n] <– 是否删除匿名用户,生产环境建议删除,默认为“y”直接回车即可。
 ... Success!

Normally, root should only be allowed to connect from 'localhost'.  This
ensures that someone cannot guess at the root password from the network.

Disallow root login remotely? [Y/n] <–是否禁止root远程登录,根据自己的需求选择;禁止的话默认为“y”直接回车即可。
 ... skipping.

By default, MySQL comes with a database named 'test' that anyone can
access.  This is also intended only for testing, and should be removed
before moving into a production environment.

Remove test database and access to it? [Y/n] <– 是否删除test数据库,生产环境建议删除,默认为“y”直接回车即可。
 - Dropping test database...
 ... Success!
 - Removing privileges on test database...
 ... Success!

Reloading the privilege tables will ensure that all changes made so far
will take effect immediately.

Reload privilege tables now? [Y/n] <– 是否重新加载权限表,默认为“y”直接回车即可。
 ... Success!


All done!  If you've completed all of the above steps, your MySQL
installation should now be secure.

Thanks for using MySQL!


Cleaning up...